Lengthen Your Hamstrings
Are your hamstrings long or short, tight or relaxed? Lengthening your hamstrings can help with running, kicking, sitting, bending and lifting more easily. Try this simple ‘Awareness Through Movement Lesson’ in the Feldenkrais Method to help lengthen your hamstrings.
READ MORE about the difference between tight and short hamstrings.
Lengthen your Hamstrings
A Feldenkrais Awareness Through Movement Lesson by Free2Move Principal Physiotherapist Jodie Krantz
KEYS TO SUCCESS
Do all movements slowly and mindfully. The movements should be made as smoothly as possible and in such a way that they do not cause you pain. Focus on the sensations you feel in your body. Try to reduce the amount of effort you use. Don’t do anything that hurts. If you feel pain, make the movement smaller and slower. If you can’t do the movement safely, just do the movement in your imagination – it will still awaken the same parts of your brain! Remember this lesson is not a stretch class, you will get better results if you go gently.
DISCLAMER
Please remember, you need to be fully responsible for your participation in this lesson. Seek medical advice before commencing any new exercise especially if you have pain or movement issues. Free2Move / Jodie Krantz cannot be responsible for any injury incurred during this movement process and you participate 100% at your own risk.
TEST MOVEMENTS
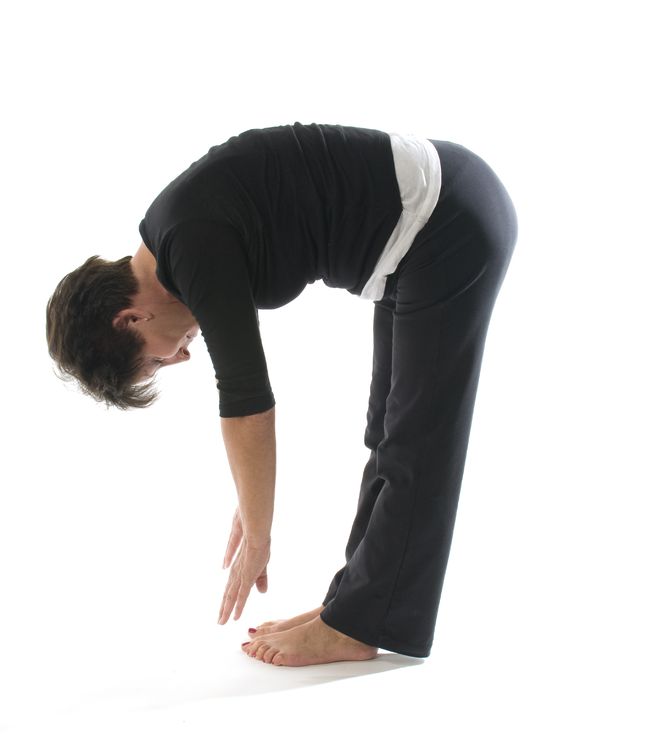
Stand comfortably. Slide your hands down the front of your legs, bending forwards, staying in a range that feels safe for you. Notice how this feels in your back and your hamstrings (back thigh muscles). How far do you go easily? What does it feel like in your back and the back of your legs? Sit in a chair and feel the effort required to hold yourself up against gravity.
SERIES OF MOVEMENTS
- Lie on your back. Stretch legs long and arms by side. Feel your contact with the floor.
- Bend your knees, put feet flat on the floor. Then cross your right ankle over the left knee. Explore your right foot with the right hand. Which surfaces can you reach easily?
- Take hold of your right foot with your right hand across the top of the foot and around the outside border. Keep your thumb together with the fingers. If you can’t reach the foot easily, make a loop out of some fabric, a strong resistance band or a dressing gown cord, loop it round your foot and hold onto the end of the loop.
- Raise and lower the foot slowly several times, each time pointing the big toe in a different direction.
- Does your leg lift your arm? Or does your arm lift your leg? Experiment with both ways of doing this. Which is easier? REST
- Lift your leg about half way up and take your leg slowly from side to side. Let the whole body follow. Use this as a way to roll over onto each side. REST
- Optional step: Lie on your back again. Link your right index finger around the right big toe. Raise and lower the foot this way several times. REST
- Place your left hand behind the back of your head. Lift your right foot with your right hand but this time lift your head with your left hand at the same time. Do you go higher?
- Go back to the original movement (See 4 above) and repeat. Is it easier? Do you go higher with less effort? REST.
- Now hold your right foot again with your right hand, as before. Is your right knee to the left or right of your right arm? Assuming your knee is outside (to the right) of your right arm, begin to straighten your knee and then move your arm to the outside of your elbow.
- Continue to bend and straighten your right knee, while holding the right foot with your right hand and keep swapping your knee from the inside of your arm to outside of the arm and back.
- Stretch your legs down long and rest again. Does one leg feel longer? Flatter to the floor? More relaxed?
- Repeat the whole sequence on the left side.
- Rest and feel your contact with the floor again.
- Hold one foot with each hand. Lift both feet together. REST
- Lie on your back and feel your contact with the floor again.
- Stand and walk and see how you feel. See what it feels like to sit in a chair. Has your posture improved effortlessly? Repeat the test movements above and notice any changes in your ability and the quality of your movements. Test out your ability to bend down and pick up something from the floor without compromising your back.
- Over the next few days repeat a few of these movements from time to time. In between times, notice any changes to your movement, flexibility and body awareness.
If you enjoyed this lesson try our video entitled ‘Free Your Hips Part 1’ – CLICK HERE